A step-by-step guide to wirelessly pair your WiFi remote.
Images
Set Up Preset Scenes (S1–S4)
For each button you want to assign:
Set your LEDs to the colour, effect and brightness you want.
Open the Presets tab and tap + Preset to create a new preset.
Give it a name and set the Save to ID to match the button:
1 = S1, 2 = S2, 3 = S3, 4 = S4
Tap Save.
Pressing S1–S4 on the remote will now recall those scenes.
The LightEFX Wi-Fi remote is a 9-button wireless controller with a range of up to 50 metres. It connects directly to your WLED controller using ESP-NOW — no extra hub or app needed. Buttons S1–S4 can each be assigned a custom preset scene.
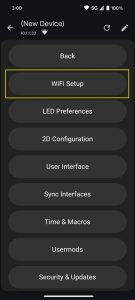
Enable ESP-NOW on the Controller
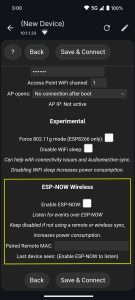
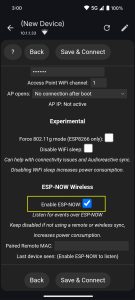
In the app or web UI, go to Config → Wi-Fi Setup and scroll to the bottom. Tick Enable ESP-NOW and click Save & Connect.
Pair the Remote
Press and hold any button on the remote for 1 second — this broadcasts the remote’s MAC address to the controller.
Go back to Wi-Fi Setup and scroll down. Under Last Seen Device, the remote’s MAC address will appear. Click it to auto-fill the field, then click Save & Connect. The page will reload and leave Wi-Fi settings — press any button on the remote, then go back into Wi-Fi Setup and scroll down to confirm the remote is paired.