Getting Started
Wiring Guides & Controller Settings
Getting Started
A guide for installing the app and setting up WiFi settings
Download & Install
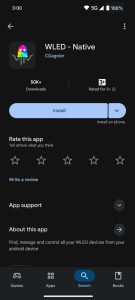
- Open the App Store (iOS) or Google Play (Android).
Search for “WLED” by Aircoookie.
Download and install the app.
Powering the WLED Controller
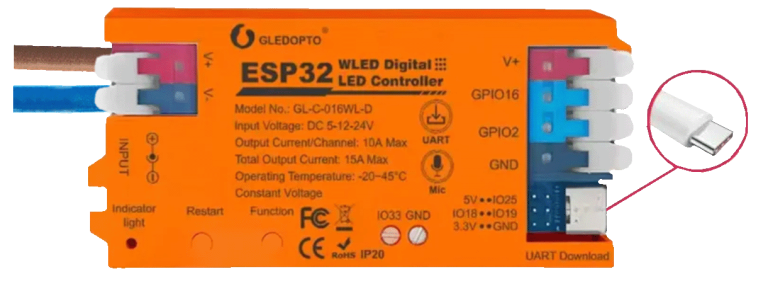
Plug the power supply into your WLED controller (ESP32).
Brown wire = Positive (+) → connect to red terminal on controller.
Blue wire = Negative (–) → connect to black terminal on controller.
For quick setup, you can also connect a USB-C cable into the controller and plug it into your computer or wall outlet.
Connect to WLED Device
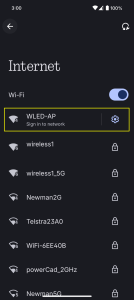
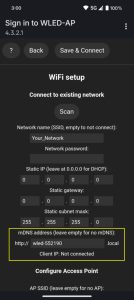
On first startup, the device creates a Wi-Fi access point named WLED-AP.
On your phones Wi-Fi settings, connect to WLED-AP. Default password: wled1234.
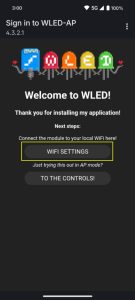
A login screen will appear (“Sign in to WLED-AP”) at http://4.3.2.1.
Go to Wi-Fi Setup → Scan. Select your home Wi-Fi network and enter its password.
- If your network does not appear, use the dropdown to select manually.
(Optional) Set a custom mDNS name (e.g.,
http://bedroom-led.local). This will allow you to connect via browser.Tap Save & Connect. The device will reconnect to your Wi-Fi and display its IP address.
Open the App
Launch the WLED app. It should auto-detect your device.
If it does not auto detect refresh the page by scrolling down.
If not, tap + and enter the IP address manually.
If the IP address is unknown:
Reconnect to the WLED-AP network.
If WLED-AP does not appear in your phone’s Wi-Fi list, press and hold the Function button on the controller for 10 seconds to restart the hotspot.
Go to Wi-Fi Setup. Scroll down to the DNS Server Address section. Find the Client IP listed there and make a note of it. Open the app and manually enter the IP address.
